Introduction: Why a Thoughtful Church Live Streaming Setup matters
In recent years, church live streaming has evolved from an optional feature to a core ministry tool. For many houses of worship, a well-executed live stream extends worship, teaching, and community beyond the four walls of the sanctuary. A robust live broadcasting workflow helps you reach homebound members, visitors exploring faith, and global audiences with a clear, reliable experience. This guide provides a practical, step-by-step overview of building a complete streaming setup for a church—whether you’re starting from scratch or upgrading an existing rig.
The goal is to deliver an experience that feels professional and welcoming, while remaining affordable, maintainable, and aligned with your church’s mission. You’ll learn about hardware and software options, network considerations, production roles, safety and compliance, and a repeatable workflow that can scale as your congregation grows.
Assessing needs and goals for the church live streaming project
Before purchasing equipment or wiring cables, take a moment to define what success looks like for your house of worship streaming operation. Consider the following questions:
Audience: Who will watch—local remote worshippers, regional viewers, or a global audience?
Content types: Will you livestream only service streams, or include Bible studies, weddings, funerals, or special events?
Platform strategy: Do you want to simulcast to multiple destinations at once (e.g., YouTube and Facebook) or favor a single platform?
Quality target: Is 720p acceptable, or is 1080p/60fps or higher desired for your community?
Budget and resources: What can you invest in upfront, and what will be ongoing maintenance costs?
Staffing: Do you have volunteers, staff, or a dedicated media team to manage production?
Defining these goals helps shape your live streaming plan and ensures investments align with ministry priorities. A clear plan also improves coordination with pastors, tech volunteers, and volunteers who handle audio, lighting, and camera operation.
Core concepts: what makes a church live streaming setup work
At a high level, a church streaming pipeline consists of content capture, signal processing, encoding, and distribution. Each step adds value and potential points of failure, so planning for redundancy and maintainability is essential. Key concepts to understand include:
Capture quality: How well your cameras and mics pick up sound and image in your sanctuary environment.
Switching and composition: The ability to switch between camera angles, inserts, lower thirds, and on-screen graphics.
Encoding: Converting raw video and audio into a stream suitable for the internet, with consideration for bitrate, resolution, and latency.
Delivery: The actual streaming to platforms or channels, including redundancy (backup streams, backup internet).
Accessibility: Captions, transcripts, and alt-text to serve all members of the congregation.
A practical approach is to design for a two-track workflow: a primary production that looks polished for live viewers, and a secondary stream that remains stable if something goes wrong in the main production.
Hardware essentials for a church live streaming setup
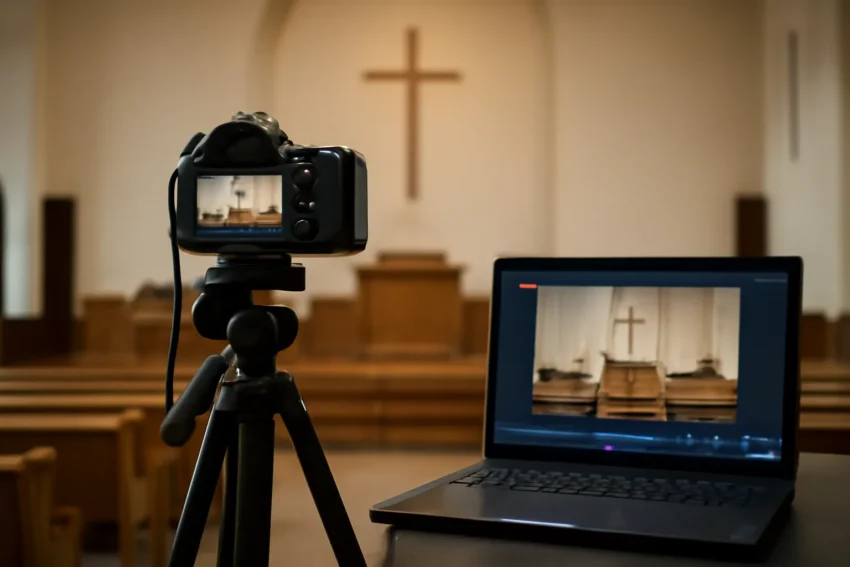
The hardware you choose should be guided by room size, budget, and desired quality. Below is a practical overview of essential components for a typical church environment.
Video capture and cameras
Camera options: PTZ cameras (pan-tilt-zoom) for large sanctuaries; compact fixed cameras for smaller rooms; or a mix depending on sightlines and budget.
Camera count: Start with 2–3 cameras for flexibility (e.g., pulpit, choir, audience) and expand as needed.
Mounting and placement: Secure mounts, proper cable management, and camera height to minimize obstructions.
Power and redundancy: Reliable power supplies, and consider back-up power or UPS in critical zones.
Microphones: A main podium mic, ambient room mics, and wireless handhelds or lavaliers for speakers as needed.
Mixing console: A compact digital mixer or an audio interface for direct feeding into the stream encoder.
Direct inputs: Ensure clean, balanced connections (XLR or TRS) and proper gain staging to avoid clipping.
Video switcher and streaming encoder
Video switcher: A hardware switcher can simplify live production by routing feeds from multiple cameras, graphics, and media players. Look for a model that supports at least 3–4 inputs if possible.
Encoder: A dedicated hardware encoder or a software-based encoder running on a computer. Hardware encoders tend to be more reliable in challenging environments.
Graphics and overlays: A simple graphics system for lower thirds and sermon titles adds polish.
Monitors and confidence monitoring
Program monitor: A display that shows the live output as your audience sees it.
Preview monitor: A second display to preview shots before pushing them to air.
Networking and reliability
Internet connection: A robust primary uplink with a wired connection; a secondary connection is highly recommended for redundancy.
Switching and routing: A dedicated network for AV gear to prevent interference with church Wi-Fi used by attendees.
Storage and archiving: Local storage for recordings or a quick backup path to the cloud for post-production or archiving.
Lighting and aesthetics
Lighting: Even, flattering lighting that reduces shadows. Key lights on speakers and softfill for audience areas.
Color balance: Consistent color temperature across cameras to avoid jarring shifts during a live stream.
Software and platform decisions for churches
In addition to hardware, software choices determine how smoothly you can run the production, manage guests, and distribute the feed. Here are common options and considerations.
Streaming software: OBS Studio, vMix, Wirecast, or Ecamm Live are popular for church contexts. Choose one that matches your skill level and hardware capability.
Platform strategy: Many churches adopt multi-platform distribution to reach different audiences, including YouTube, Facebook, and a church website.
RTMP and ingest: Set up a stable ingest for each platform; consider an event-based encoding profile to optimize for each destination.
Captions and accessibility: Use built-in captioning tools or third-party services to improve accessibility for all attendees.
Automation and production aids
Lower thirds: Display speaker names and verse references cleanly on screen.
Chroma key and backgrounds: If you use a green screen, ensure lighting and color spill are controlled for a clean key.
Media playback: Preloaded sermon slides or video clips can be triggered during the service without fuss.
Camera systems, lighting, and visual workflow
The visual quality of your live stream often anchors the audience’s perception of professionalism. A thoughtful approach to camera work and lighting makes a big difference.
Camera setup and framing
Shot composition: Plan at least a wide shot of the sanctuary, a podium/reader shot, and a close-up for individual speakers.
Camera motion: If possible, use smooth, slow pans or zooms rather than rapid movements that can be distracting.
Redundancy: Have a backup camera or two ready in case of a fault or occlusion.
Lighting principles
Three-point lighting: Key, fill, and backlight create depth and reduce harsh shadows on speakers.
Color temperature: Match color temperature across all cameras (typically 3200K–5600K range depending on your lights and ambience).
Avoid overexposure: Use proper gain levels and camera exposure to prevent washed-out highlights.
Graphic overlays and lower thirds
Lower thirds: Display speaker name, title, and sermon title without covering critical visuals.
Branding: Maintain church branding with consistent fonts, colors, and logo placement.
Audio planning for faith communities: capturing voices clearly
Audio quality is often the deciding factor in whether viewers stay engaged. Invest in clear, natural sound and prevent feedback or hums that can ruin the experience.
Microphone strategy: A main go-to mic for the speaker, ambient mics to capture the choir or congregation, and optional wireless mics for guests or readers.
Proximity effect: Position mics to minimize plosives and achieve consistent levels across speakers.
Direct vs ambient: Use direct feeds for speech while preserving ambiance for a natural room sound when appropriate.
A well-tuned audio chain reduces listener fatigue and ensures the message is accessible to everyone. Always test levels with several speakers and in different parts of the sanctuary.
Streaming architecture: where to host and how to distribute
Your streaming architecture defines reliability, latency, and accessibility. There are two main approaches: cloud-based ingest and on-premise processing. Each has pros and cons.
Cloud-first or hybrid approach
Cloud-based encoders: Use a software encoder on a reliable computer and send the stream to a cloud ingest service; this reduces on-site processing needs and allows easier scaling.
Hosted distribution: Platforms like YouTube Live, Facebook Live, or Vimeo Live can act as distribution points, providing reach and analytics.
Backup streams: Maintain at least one backup stream on a different platform or via a secondary bitrate to guard against platform outages.
On-premise encoders and local storage
Local encoding: For organizations that require complete control, an on-site encoder can deliver a stable feed even if internet access is temporarily compromised.
Local recording: Record a high-quality local copy for post-service editing, re-broadcasts, or archive purposes.
Network segregation: Run audio/video networks on a dedicated VLAN to minimize interference from the church network or attendees’ devices.
Workflow, roles, and a sustainable production team
A polished live stream is the result of a reliable workflow and people who know their roles. In many churches, a small team of volunteers can handle weekly streams if properly trained.
Production roles
Director/Producer: Oversees the service, calls camera cuts, and tracks timing with the sermon outline.
Switcher/Technical director: Manages switcher inputs, graphics, and streaming hardware during the service.
Audio engineer: Balances sound levels, mics, and monitor feeds for the live stream.
Camera operators: Manage camera angles and framing; two or three operators work well for most sanctuaries.
Graphics/op artist: Handles lower thirds, sermon slides, and on-screen branding.
Build a simple, repeatable operational checklist for each service, covering pre-service checks, mic test, camera presets, and streaming readiness. Regular drills help volunteers become confident and prevent on-air errors.
Step-by-step setup: a practical guide from planning to go-live
This section provides a practical, end-to-end workflow that churches can adapt to their space and team size. It emphasizes reliability and repeatability.
Pre-production planning
Define the service format: Prelude music, welcome, worship songs, message, closing, and announcements.
Layout and camera plan: Decide on a 2–3 camera arrangement and where each camera will be placed.
Venue walkthrough: Note sightlines, potential interference, and electrical outlets for camera and audio gear.
Network map: Diagram the network path from the sanctuary to the encoder, including backup routes.
Equipment setup and calibration
Camera calibration: White balance, exposure, and frame rate settings aligned across cameras.
Audio calibration: Set gain staging, feedback checks, and monitor levels for the speaker and congregation mics.
Graphics templates: Prepare lower thirds and sermon titles consistent with branding.
Go-live readiness and testing
Test stream: Run a 5–10 minute test to verify video, audio, latency, and platform ingestion.
Backup plan: Have a backup encoder ready and a backup internet path tested.
Accessibility checks: Enable captions or provide a script for captions if available.
During the service
Camera cues: Follow the sermon timeline and switch shots accordingly; avoid abrupt or repetitive moves.
Audio hygiene: Watch for pops, sibilance, or levels that creep into distortion. Adjust as needed.
Engagement prompts: Use on-screen graphics to invite viewers to subscribe or visit the church website.
Post-production and archiving
Full recording: Save the master file for later editing, repurposing, or on-demand viewing.
Highlight reels: Create shorter clips from the service for social media outreach.
Quality review: Note issues to inform future improvements for the next service.
Budgeting, procurement, and total cost of ownership
A practical budgeting approach balances initial capital costs with ongoing maintenance. Consider both upfront investments and recurring expenses to maintain the system.
Phased upgrades: Plan a staged approach (e.g., start with two cameras and a simple encoder, then expand as needed).
When budgeting, consider total cost of ownership over three to five years. The goal is to maintain reliable operation and scalable growth without breaking the budget.
Accessibility, legal, and safety considerations for live worship streams
Streaming content to a broad audience brings obligations to accessibility, privacy, and safety. Addressing these concerns helps ensure your church streaming effort is respectful and compliant.
Captions: Provide real-time or pre-prepared captions to improve accessibility for deaf or hard-of-hearing viewers.
Consent: Obtain consent for individuals who may appear on camera, especially if kids or guests are involved.
Copyright: Ensure music and media used in the service are properly licensed for streaming.
Data privacy: Minimize data collection and comply with applicable regulations on audience data and recordings.
Safety protocols: Set up electrical safety, cable management, and weather-related contingencies for outdoor or hybrid services.
Maintenance, upgrades, and ongoing improvement
A streaming system thrives with routine maintenance and planned improvements. Establish a maintenance calendar to minimize downtime.
Regular checks: Inspect cables, power supplies, and mounting hardware for wear or looseness.
Firmware updates: Keep cameras, encoders, and switchers up to date with stable firmware versions.
Spare parts: Maintain a small inventory of essential parts such as cables, adapters, and fuses.
Performance reviews: After several services, review metrics, viewer feedback, and technical logs to identify improvements.
Case studies and practical examples: variations by church size and space
While every church is unique, common patterns emerge. Here are some representative examples that illustrate how different setups can be designed to fit varying spaces and budgets.
Small church, modest budget
Two cameras (one wide, one on the pulpit) with a simple software encoder on a mid-range PC.
Single audio mixer feeding the encoder with a dedicated church Wi-Fi as a backup via a cellular hot-spot.
Platform strategy focused on a single destination (e.g., YouTube Live) with basic captions.
Medium church with a single sanctuary
Three cameras (PTZ for hard-to-reach angles, handheld for closeups) plus a compact video switcher.
Dedicated audio mixer and a backup power supply; backup internet path using a cellular modem.
Multi-platform distribution with a primary YouTube stream and a secondary Facebook Live stream; basic lower thirds templates.
Large church with multiple spaces
Modular camera system across the campus, with a central production hub and a control room.
High-quality audio chain with multiple wireless mics and a robust mixing console integrated with the encoder.
Advanced graphics, multi-stream distribution, captioning, and a more formal backup strategy including redundant hardware and network paths.
Regardless of size, the guiding principles remain the same: plan thoroughly, test rigorously, and document your workflow so volunteers can operate smoothly week after week.
Final checklist: a practical quick-start for church teams
Define goals and audience for the streaming ministry.
Assess sanctuary space and determine camera positions and lighting needs.
Choose a scalable workflow with 2–3 cameras and a reliable encoder.
Secure a backup plan for internet and power.
Test thoroughly before every service, including audio checks and platform ingestion tests.
Create a production script with cues for camera switches and graphics.
Train volunteers and document a standard operating procedure (SOP) for each role.
Publish accessibility features such as captions and transcripts where possible.
Review after service and log improvements for the next week.
Conclusion: you can build a reliable and meaningful church live streaming setup
A successful church live streaming setup blends thoughtful planning, solid hardware, careful production workflows, and a compassionate approach to accessibility and inclusion. By defining clear goals, choosing scalable hardware and software, and building a sustainable team, your house of worship can extend its reach with quality streams that honor the worship experience. Whether you are starting from scratch or upgrading an existing system, a disciplined, phased approach helps ensure that every service is a meaningful, reliable, and welcoming broadcast to the online community.
Remember that technology serves people. The best streaming setups are those that strengthen connection—between pastor and congregation, between the sanctuary and home viewers, and among volunteers who contribute their time to bring the service to life. With the right plan, you can deliver HD streaming experiences that feel intimate, professional, and faithful to your church’s mission.